Today’s blog comes courtesy of 3Dhotbed collaborator Devin Fitzgerald, Curator of Rare Books and History of Printing at UCLA Library Special Collections. Devin reached out to the 3Dhotbed team in 2017 while working with Doug Daniels in the UCLA Lux Lab to scan the entire collection of 37 woodblocks held in Library Special Collections. His blog post answers some user-submitted questions related to printing the woodblock hosted in the 3Dhotbed project as well as printing images from the 3D printed woodblock.
Dr. Fitzgerald incorporated the woodblocks into a history class covering Qing history through Manchu sources. He has also written about how best to incorporate Chinese printed blocks and 3Dprinted woodblock replicas into instruction on his blog.
![[Dataset: Jin gang jing xin jing gan ying tu shuo 金剛經心經感應圖說 pp. 31-32] available at https://digital.library.unt.edu/ark:/67531/metadc1259405/](https://images.squarespace-cdn.com/content/v1/589393ddbe6594ef24d3651b/1602884849138-CIFUZRXDEPG9CVK5ZPEY/31-32-gif.gif)
[Dataset: Jin gang jing xin jing gan ying tu shuo 金剛經心經感應圖說 pp. 31-32] available at https://digital.library.unt.edu/ark:/67531/metadc1259405/
How To Print from Your 3D Printed Woodblock
I’ve recently received a number of questions about the Chinese printing block currently hosted on the 3D Hotbed platform. In this brief post, I will attempt to respond to several of these questions, as well as provide a brief explanation of how I have started to experiment with the blocks.
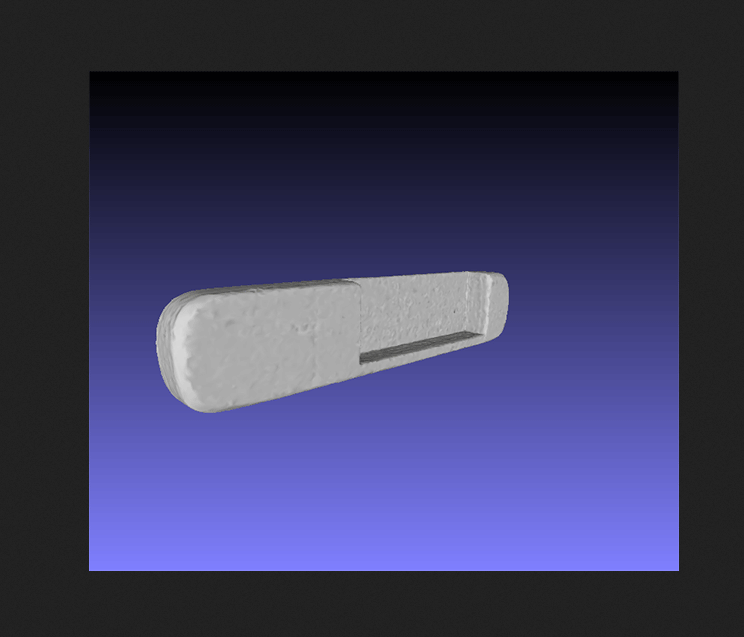
My block is warped
One common question I’ve received from users attempting to print the block is “why it is warped?” Although East Asian printing blocks were planed to be flat, repeated exposure to the moisture of carbon based “India ink,” climatic fluctuation, or improper storage will warp the wood. Most of the blocks from this collection held at UCLA are slightly warped. The warping is not too bad, considering that they are over 200 years old. When the blocks were scanned, they retained the shape of the original object. So, when you print the block, expect some warping. One important thing to bear in mind is that even warped, East Asian printing blocks are perfectly usable, since prints were pulled by rubbing – and not a letterpress.
This Block is too Big for my Printer
This can be a bit of a problem. Most standard 3D printers will not be able to print the woodblock to scale. If you want to print the block as a single piece, you will likely have to resize it to fit your printer bed. If you want a full size block, I recommended printing it in four parts, cutting it directly down the middle, and halving the recto and verso of each half. This has the advantage of giving you a flat side for printing. It also makes for a handy teaching reference since a page in a Chinese book was printed from a single side of the block, and then folded in half. For background on these blocks see
How do I Print the Image from this block?
This question is the real reason for this post. Since the woodblocks are printed with resin (a UV sensitive liquid polymer), traditional Chinese printing tools cannot be used. The video below can give you a sense of how efficiently someone could print a page using water and carbon based India ink, a palm brush, paper, and a Chinese style brayer.
Coming soon: Video
Water-based inks slide right off the surface of a 3D printed block. To print from a 3D printed block I recommend buying a speedball printing kit like this one.
For our purposes, important tools from the kit are: the brayer, the ink, and the baren. If you’d prefer not to purchase the entire kit, you can purchase those items separately. Onto printing!
Take your block – which maybe you’ve printed in quarters like we have in the video below – and lay them out on some newspaper.
Next, warm up your ink on a flat, smooth surface. A little bit goes along way.
Apply the ink evenly with a brayer to the printing surface.
Once the ink is evenly spread over the block, it’s time to select paper. In my experience, the sort of paper you choose plays the largest role in producing a nice quality print. Cheap calligraphy paper from Daiso is good for practicing.
Once you’ve got paper you’re happy with, it’s just a simple matter of using your baren and praying that you’ve got your inking right.
Now, do it about 20 more times to get the hang of it!